With the Fourth of July just a few days away, we are super excited to celebrate with family and friends. This will also be Hailey's first 4th of July, so she has a new outfit and head band for the occasion. You will see pics of it on Facebook next week! Tyler is an old pro at 4th of July celebrations and he loves burgers. In order to get him excited about the day, we decided to do a fireworks craft project. Here's everything you need to know to do the project yourself!
What you'll need:
Paper towel or toilet paper roll
How to make it:
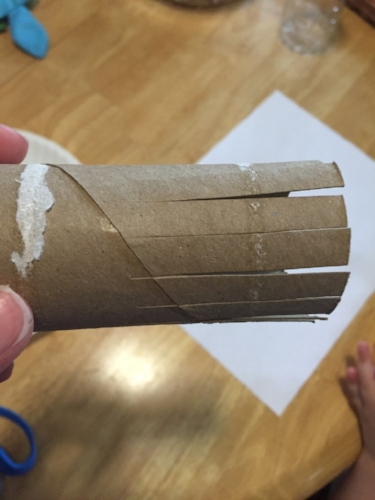
1. First mom or dad or some other adult will need to cut slits along the edge of the paper roll. They should be about 2 inches long and spaced pretty close together. It should look like this:
2. Splay out the strips that you created so that it looks like an exploding firework. You have now created your firework stamper.
3. Pour some paint out onto a paper plate. This will be your stamp pad.
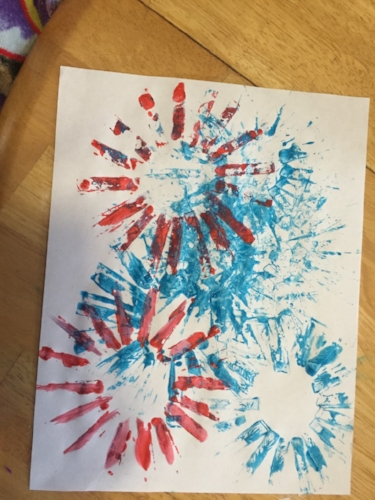
4. Dip your stamp into the paint and then stamp it onto your paper to create fireworks. You may need to use your fingers to push down the individual strips. This can get messy, but that's part of the fun!!
5. You can cut up multiple tubes with different length slots for different sizes of fireworks. You can also use multiple plates for multiple colors or put multiple colors on one plate for a multicolored firework.
We will also be whipping out our red, white and blue placemats for the occasion. You can see how we made those here!
We are all set for a fun filled 4th of July weekend. Tomorrow we will be going to the Westchester Children's Museum for more 4th of July crafts. Then Sunday were heading to a beach club for music, fun and fireworks. Monday we'll be bbqing with friends and family.
We hope you all have a fun filled 4th of July weekend with friends and family! See you next week!!
Cheers,
Emily









Tips to increase your energy and organization to get through a busy day.