In honor of Memorial Day coming up, Tyler and I created an Uncle Sam craft to celebrate. This was lots of fun and involved more steps than some of our past crafts. At 4, Tyler definitely appreciated this. Plus, since this project involved painting, it gave us something to do while the paint dried. Check it out!
Easter Bunny Paper Plate Craft
Last week Tyler and I created a cute little Easter bunny project with some basic craft supplies. While there was some controversy over whether a bow tie is an article of clothing or a food item (bow tie pasta), we really enjoyed the project overall. This was another quick and fun project that we were able to do in the time between Hailey going to bed and Tyler's bedtime.
Leprechaun Hat Toddler Craft
A week from today is St Patrick's Day so we were due for a new craft project! This week we created a Leprechaun Hat using popsicle sticks. We had a ton of fun plus Tyler informed me that the hat buckle looks like Gaston's shoes from Beauty and the Beast. So there's that. Check out how we created our craft!
Heart Man Valentine's Day Craft
The last few nights, T has really been into creating. The other night he painted a picture of himself with his friend Adele. He also painted his friend Daniel with his dog. With Valentine's Day just a few weeks away and with T enjoying being creative the past few evenings, we decided it was a good time to create a Valentine's Day project. This was a quick and easy little craft that we were able to complete in about 30 minutes. That means it fit right into the time between when Hailey goes to sleep and when T gets ready for bed. T had a lot of fun with this project especially with the gluing, as usual. Check out how we made heart man!
Paper Plate Christmas Tree Craft
In case you haven't noticed by now, my son loves to make crafts involving paper plates. In fact, if he sees me grab a paper plate, he is more likely to think it is craft time than food time. Therefore, this Christmas' craft project of course involves a paper plate. This project was a lot of fun and includes two of my toddler's favorite things: painting and using stickers. Check it out!
Pilgrim Hat Craft and Gratitude Banner
This week T has been a little under the weather, so we took it as an opportunity to do more sedentary, quiet activities. This week we made two projects: a pilgrim hat and a gratitude banner. These are two easy and fun projects. T is starting to use scissors in school so he was able to help with some of the cutting for these projects.
Halloween Ghost and Spider Lollipop Crafts
Labor Day Wreath Craft Project
With Labor Day coming up, T and I decided to make another patriotic craft project. I found this project on Pinterest, so if you remember my Things to do Before 32 post, this helps me with one of my things to do. Our patriotic wreath combines two of my 3 year old's favorite things to do: glue things and tear things up. It actually looks pretty cute too!! T liked it so much he actually asked to make a second one and was all set to make a third when bedtime rolled around. So check out how you can make a patriotic wreath to decorate for Labor Day.
What You Need
Red, white, and blue construction paper
Star cookie cutter or any star shape you can trace
What To Do
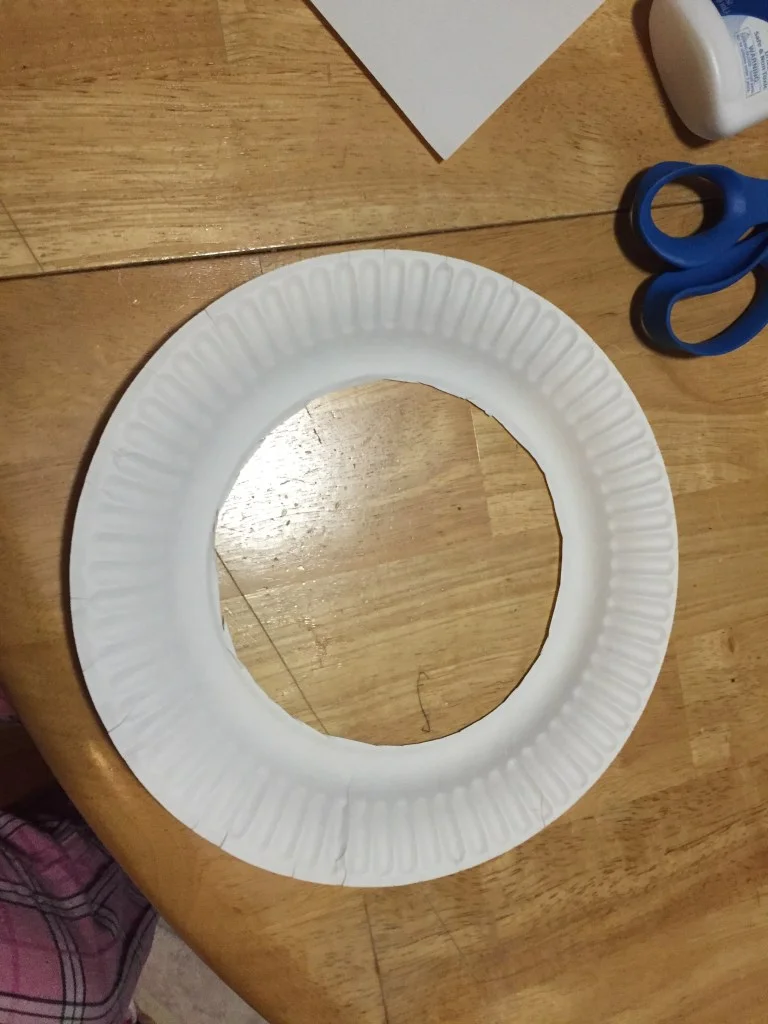
1. The first step is to cut out the center of the plate. I did this by bending it in half, cutting a slit, and then cutting out the center of the plate.
2. Next, your kids can rip up small pieces of the red and blue paper.
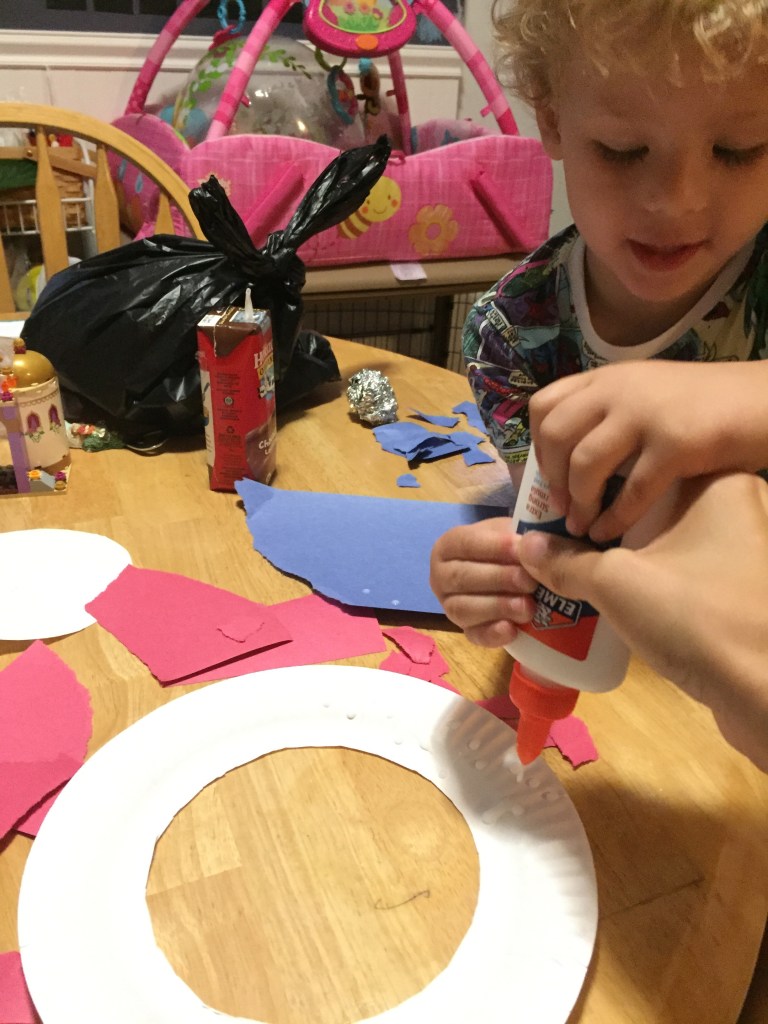
3. Help your kids spread the glue all over the plate and then let them attach the ripped up pieces of paper all over the plate.
4. While your kid is busy gluing on the scraps of paper, you can trace and cut out 3 white stars from the white paper.
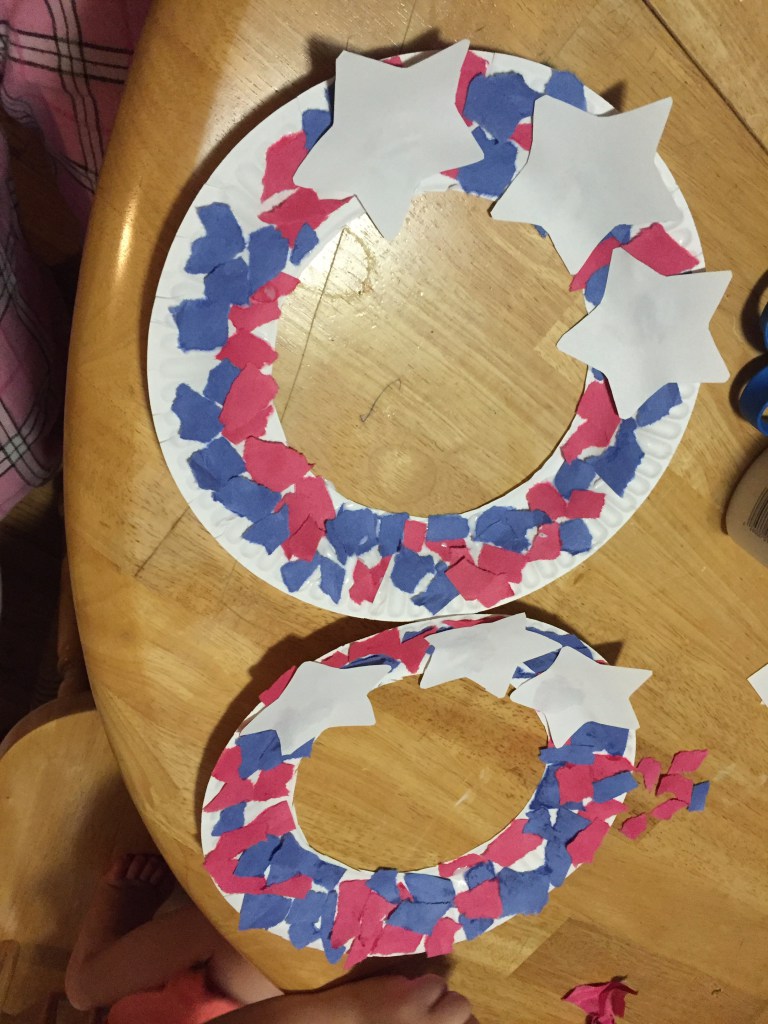
5. When your plate is fully covered to your child's liking, glue on the 3 stars for a fun patriotic wreath.
This is a super fun project for Labor Day or Memorial Day, 4th of July, or any day you want to be patriotic. You can check out our other patriotic craft projects here and here. As I said, my toddler liked it so much he wanted to keep making more. He really loves tearing and gluing. Older kids can get more involved by helping with the tracing and cutting as well. You can also challenge them to create cool mosaic type patterns with the red and blue papers instead of just random pasting. This is another great project when you have limited supplies but want something fun and festive.
Try it out and let me know if your child enjoys it!
Cheers,
Emily
Fourth of July Fireworks Craft
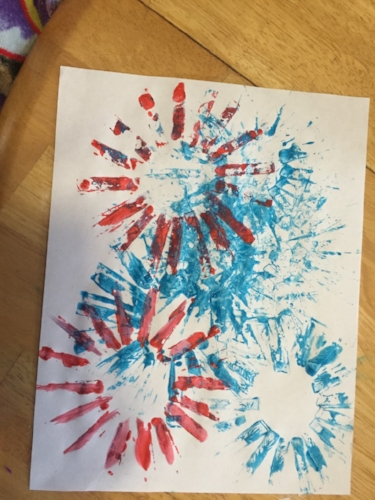
With the Fourth of July just a few days away, we are super excited to celebrate with family and friends. This will also be Hailey's first 4th of July, so she has a new outfit and head band for the occasion. You will see pics of it on Facebook next week! Tyler is an old pro at 4th of July celebrations and he loves burgers. In order to get him excited about the day, we decided to do a fireworks craft project. Here's everything you need to know to do the project yourself!
What you'll need:
Paper towel or toilet paper roll
How to make it:
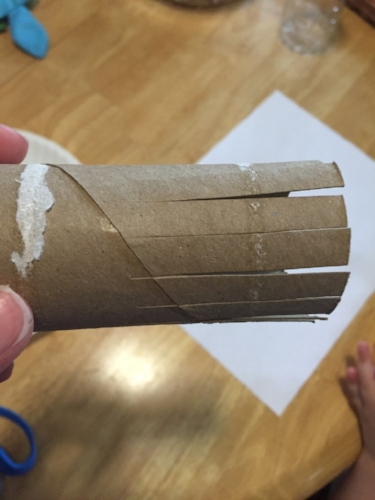
1. First mom or dad or some other adult will need to cut slits along the edge of the paper roll. They should be about 2 inches long and spaced pretty close together. It should look like this:
2. Splay out the strips that you created so that it looks like an exploding firework. You have now created your firework stamper.
3. Pour some paint out onto a paper plate. This will be your stamp pad.
4. Dip your stamp into the paint and then stamp it onto your paper to create fireworks. You may need to use your fingers to push down the individual strips. This can get messy, but that's part of the fun!!
5. You can cut up multiple tubes with different length slots for different sizes of fireworks. You can also use multiple plates for multiple colors or put multiple colors on one plate for a multicolored firework.
We will also be whipping out our red, white and blue placemats for the occasion. You can see how we made those here!
We are all set for a fun filled 4th of July weekend. Tomorrow we will be going to the Westchester Children's Museum for more 4th of July crafts. Then Sunday were heading to a beach club for music, fun and fireworks. Monday we'll be bbqing with friends and family.
We hope you all have a fun filled 4th of July weekend with friends and family! See you next week!!
Cheers,
Emily
Memorial Day Craft Project
This week T and I created our Memorial Day craft project. I had several Americana themed craft projects in mind, but we selected this one because it is useful and doesn't involve fireworks. We are saving our firework themed project for 4th of July. So what did we make? Red, White and Blue placemats.
Here's what you will need:
Ruler
Scissors
Glue
2 sheets of blue construction paper
1 sheet each of red and white construction paper
Contact paper
How to Make Two Placemats:
1. First measure out 1 inch strips on the blue papers so that the strips will be the long way. Cut them out.
2. Measure 1 inch strips on the red and white paper so the strips are the short way.
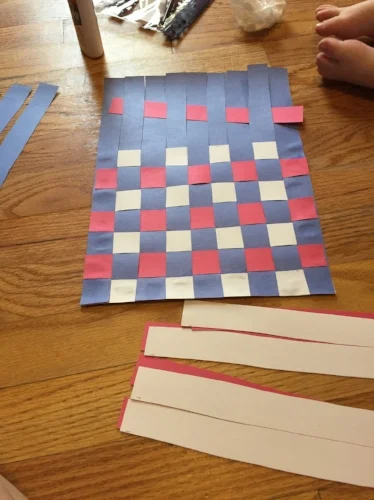
3. Start with either a red or white strip. Take each blue strip alternately glue them to the red or white strip switching between on top and under the strip. See picture below.
4. Alternate weaving the red and white strips into the blue strips. Glue the ends of the short strips to the blue.
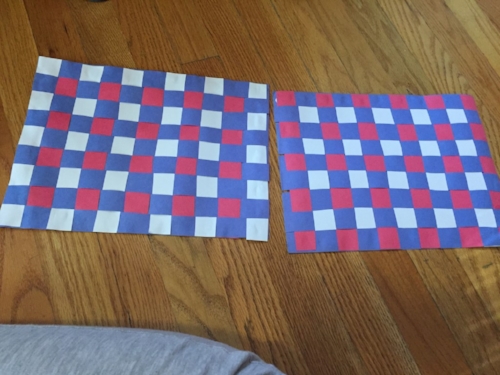
5. When you get to the last strip, glue the ends of all the blue strips to the last strip. We ended up with one extra strip each of the red and white when we completed the placemats.
6. Once completed and the glue has dried you can cover the placemat with contact paper so that it can withstand spills. Below is the finished placemats without the contact paper as the contact paper caused a glare.
T had a lot of fun with this project. He especially enjoyed the gluing. Since he is also a big fan of cleaning, he also enjoyed wiping up any excess glue. We worked on the weaving part together. This was an easy project to complete while the baby napped.
Since we plan on bbqing this weekend, these placemats will come in handy! You can also reuse them for Independence Day, Labor Day and any other patriotic celebration. The project is easily scalable to make enough placemats for the whole family.
I hope everyone has a fabulous Memorial Day Weekend!
See you on Tuesday!
Cheers,
Emily
A Baby Shower For Hailey
On Sunday, my family threw us a baby shower for Hailey. Since Hailey is baby number 2, this was mostly a way to celebrate our new addition with family and friends. We have a lot of items that will be passed down from T, but we were also able to stock up on some much needed girl clothes!
In order to help T be a part of the celebration, we made two projects in preparation for the shower. The first was a candy-filled umbrella favor and the second were marshmallow pops. These were a lot of fun to make and definitely helped T start to take on his role as a big helper.
Candy-Filled Umbrellas
What you need:
How to make them:
1. First we decorated the cone shaped cups with Tyler's doodles and the words "Baby Hailey 4/10/16".
2. Next, we cut out strips of tulle to wrap our cones in. The width of our tulle was 6 inches so we needed two pieces for each come to make sure the jelly beans didn't fall out. We also cut strips of ribbon which we used to tie the tulle together.
3. I hot glued the candy sticks into the center of the cone to be the umbrella handle.
4. Tyler filled the umbrellas with jelly beans.
5. I wrapped each jelly bean filled cone with tulle. This was done by placing an x of tulle on the table, placing the point of the cone in the center, and then wrapping the cone with the tulle. I tied it off with a piece of pink ribbon.
I think they came out pretty cute. We obviously chose pink since we were having a girl shower, but you can pick any color you like depending on whether or not you know the gender. Now, on to the marshmallow pops. T really enjoyed making these. Again, we used pink candy melts for our pops, but they would be just as cute with any other color.
Marshmallow Pops
What you need:
How to make them:
1. First we laid out a bunch of marshmallows on a plate and Tyler inserted the paper straws. He pretty much just jammed them in there.
2. I melted the candy melts in the microwave. First for one minute and then for 30 second intervals stirring in between until it was all melted.
3. Together we dipped the marshmallows in the melted candy and sprinkled them with sprinkles. At first T was shoving the marshmallows into the sprinkles, but we found that sprinkling them on top was much more efficient and less messy.
4. We stuck the straws into Styrofoam so the candy could dry.
That's the finished product. They may not be perfect, but they were made with love. Plus we had a lot of fun making them. Even dad helped out!
We had so much fun at the shower. It was great hanging out with friends and family. Tyler recited the end rant from Willy Wonka several times and we all enjoyed good food and good company. Here are some shots from the party.
3 weeks left til D-day!! We are so excited!! Have a happy weekend everyone!
Cheers,
Emily
St Patrick's Day Craft Project
This weekend T and I spent a lot of time together. He was sick Friday night so we spent the whole weekend home. It was a great opportunity to sit down and create our St Patrick's Day craft project. This was a quick and easy project that allowed T to paint, so he really enjoyed it. We hope you do too.
Materials
Instructions
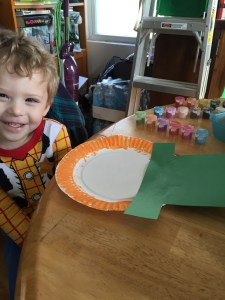
The first step is to paint the border of your plate orange. This will serve as the hair and beard of your leprechaun. T was pretty good about staying within the border. If your kid is not so neat, no worries! You can always cut out a white piece of construction paper in a circle and paste it into the center of your plate for the face.
2. While your paint dries, you can let your toddler create a new painting. At least, that's what T did. In the mean time, I cut out a hat shape from green construction paper, a band for the hat out of black paper, and a buckle out of yellow paper. For the buckle, I cut out a square, bent it in half, and then cut out a smaller square from the center.
3. Once the paint has dried and the hat pieces are cut, it's time to start gluing. Tyler loves to help squeeze out the glue and put the pieces in place!
4. The final step is to draw a face onto your leprechaun. We used a black crayon for this. If you want to add more to this project, you can also make arms and legs for your leprechaun. You can cut 4 strips of green construction paper long ways and fold them accordion style. Glue them around the plate for the arms and legs. You can cut out hands from white paper and shoes from black paper and attach them as well.
Here is our final project!
We hope you try this project yourselves. It's fun and easy and doesn't require many supplies!
Share your finished project on our Facebook page!!
Cheers,
Emily
Valentine's Day Toddler Craft
Christmas Tree Craft
Thanksgiving Food and Fun
Every year the T monster and I do a thanksgiving craft. I also always make fried apple pies every thanksgiving. This is a big hit in our family and always requested. What's awesome is they are so easy to make! This year I thought I'd share some of our traditions with you!
First let's start with the craft. This year we made a:
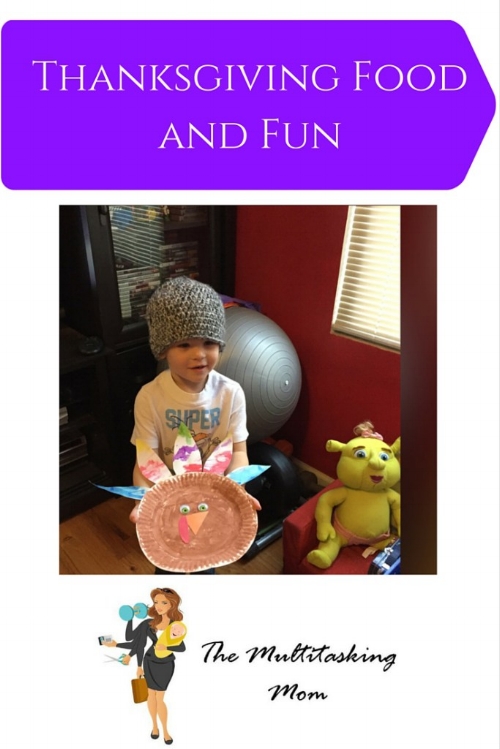
Paper Plate Turkey
What You Need:
Orange and red construction paper
1. Let your toddler paint the white paper. There are no rules here. Just paint whatever wherever. Meanwhile, I painted the plate brown. Older kids can probably do this themselves.
2. Cut out a beak from the orange construction paper and a wattle from the red. Your toddler can help you glue these onto the paper plate along with the eyes.
3. Once your child's painting finally dries (this can vary depending on paint usage), cut feathers out of the painted paper. Glue the feathers along the top of the plate.
4. Show off your finished turkey to everyone and anyone!
Next, we have the apple pies. These are super simple to make and the recipe is easily multiplied for larger batches.
Fried Apple Pies
Ingredients:
1 can Grands Buscuits
2 green apples (I like Granny Smith)
1/2 tsp cinnamon
1/3 cup brown sugar
Vegetable oil
1. Peel and dice the apples.
2. Apple is a sauce pot and mix in cinnamon and brown sugar. Heat until warm.
3. Roll out the biscuits into discs. Place a heaping spoonful of the Apple mixture in the center. Coat the edge of the disc with water and fold over to seal.
4. Heat vegetable oil in pan. Once hot fry pies 2 at a time until they are golden brown. This should take a few minutes per side.
5. Set on paper towels to cool. Enjoy!!
Both the food and the craft are super easy to make and they both were a hit!! The apple pies make a great on the go snack as well!! Hope you try these and let me know how they turn out!!
Enjoy!!
Emily

























How to make a cute 4th of July Firecracker that can also be used as a party favor!